This week during my project meeting I picked up one of the sensor units that will be placed on the hand of the patient during the scanning procedure. The small box (seen below) has gone through a couple iterations so its size has and will be differing over the course of this semester.
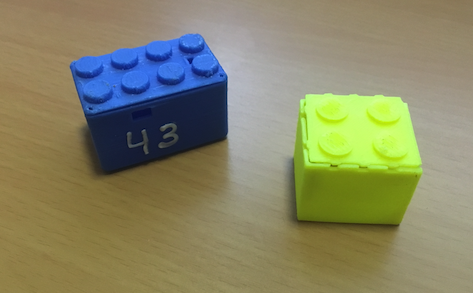
The thing that is unique about it however is the bright colours that are used during the printing of the casing. This distinct attribute of the block will be my focus point this week as I try to come up with a method of detecting the object, without create too much overhead.
The computational resources required to process the RGB values in an image are considerably lower than most of the other algorithms I’ve been looking at over the last month. This makes it a perfect starting method to quickly single out the block on the hand and lower the search area for my other more computationally expensive algorithms.
The other big reason, is something I already mentioned which is that the block colours are very distinct so there will hopefully be a high chance that the largest object detected in a scene will be the block I’m searching for.
I used a tutorial by Adrian Rosebrock to quickly get a rudimentary colour detector setup. The code the tutorial supplied was originally used to detect a blue Pokemon Gameboy cartridge with an output similar to the image below.

The code I implemented can be seen below.
import numpy as np
import cv2

cap = cv2.VideoCapture(0)

while True:
    # Capture frame-by-frame
    ret, image = cap.read()

    # define the list of boundaries
    boundaries = [
	([86, 31, 4], [220, 88, 50])
    ]

    # loop over the boundaries
    for (lower, upper) in boundaries:
        # create NumPy arrays from the boundaries
        lower = np.array(lower, dtype="uint8")
        upper = np.array(upper, dtype="uint8")

        # find the colors within the specified boundaries and apply
        # the mask
        mask = cv2.inRange(image, lower, upper)
        output = cv2.bitwise_and(image, image, mask=mask)

        imageOut = np.hstack([image, output])

    # Display the resulting frame
    cv2.imshow('RGB',imageOut)
    if cv2.waitKey(1) & 0xFF == ord('q'):
        break

# When everything done, release the capture
cap.release()
cv2.destroyAllWindows()
The tests for this system worked considerably well for a first attempt on the blue block
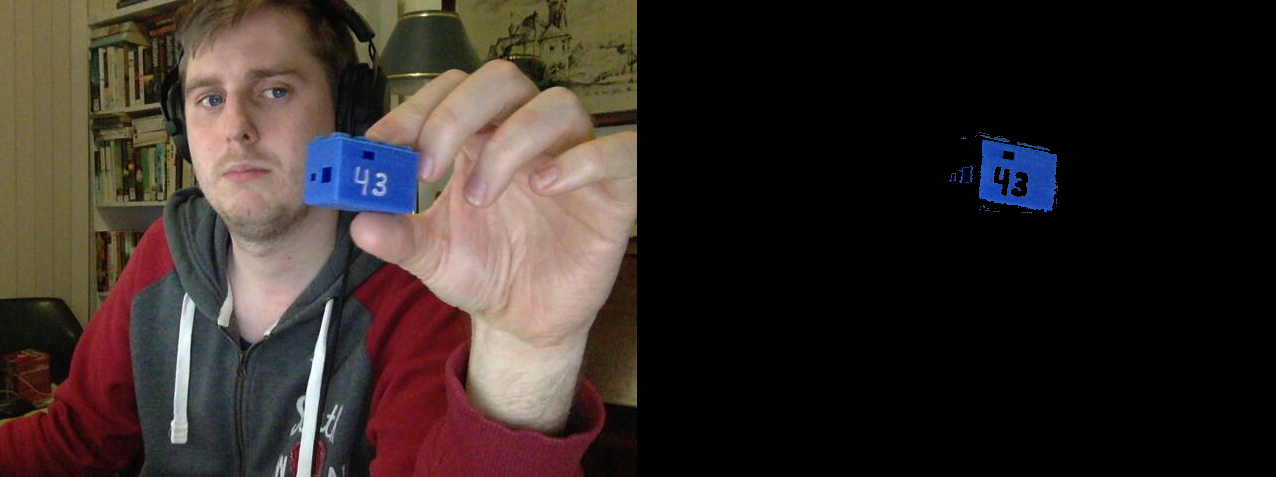
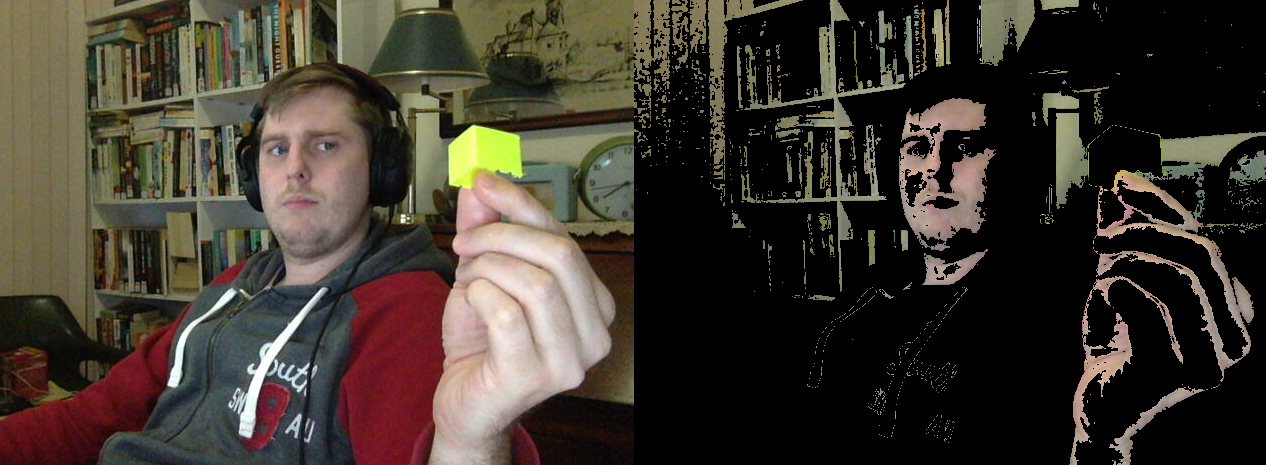
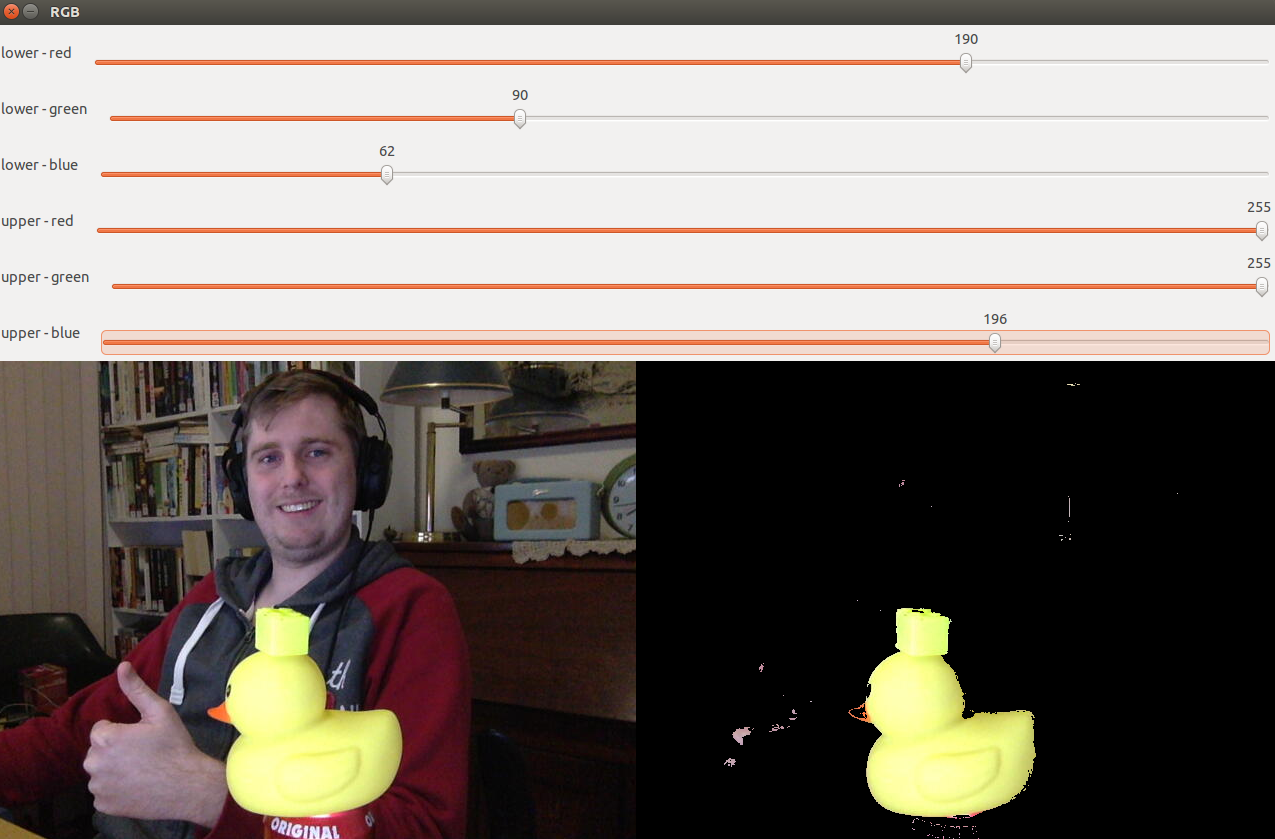
In fact it worked too well, and it majorly got my hopes up about how easy this method was going to be. Blue is an interesting color because it isn’t really commonly seen in the particular shade I was targeting. Yellow on the other hand turned out to be a very very prominent colour in practically everything. In fact the results from the yellow tests were pretty terrifying.
The issue I started to face very quickly was that I had no good way of testing boundaries when I needed to include a new coloured block other than guessing and checking. It might not seem like a big deal, but I knew at some point down the line I would need to look into boundary calibration so I decided to build a little application for this very purpose.
boundedRGB is a simple RGB boundary manipulation tool that allows for real time changes to the RGB bound variables during scroll sldiers.
I took a lot of care to ensure input values are always handled correctly; particularly when dealing with lower bound thresholds that exceed the upper bounded ones. Below is a code snippet with an example of this logic.
    thrs1 = cv2.getTrackbarPos('lower - red', 'RGB')
    thrs2 = cv2.getTrackbarPos('lower - green', 'RGB')
    thrs3 = cv2.getTrackbarPos('lower - blue', 'RGB')
    thrs4 = cv2.getTrackbarPos('upper - red', 'RGB')
    thrs5 = cv2.getTrackbarPos('upper - green', 'RGB')
    thrs6 = cv2.getTrackbarPos('upper - blue', 'RGB')

    if(thrs1 > thrs4):
        cv2.setTrackbarPos('lower - red', 'RGB', thrs4 - 1)
    if(thrs2 > thrs5):
        cv2.setTrackbarPos('lower - green', 'RGB', thrs5 - 1)
    if(thrs3 > thrs6):
        cv2.setTrackbarPos('lower - blue', 'RGB', thrs6 - 1)
Quick one this week, but very productive esspecially now that I have a really good method of quickly implementing new block colours in my code. Something I’ll have to look at in the future is a way to allow end users to setup their own profiles.
OpenCV and Python Color Detection - http://www.pyimagesearch.com/2014/08/04/opencv-python-color-detection/
boundedRGB - https://github.com/HandMap/boundedRGB