During a previous post I transitioned from using an RGB detection method to a HSV one. At the time I didn’t really understand why it worked more effectively so I just went along with what I was reading and told myself I would come back to it if an issue arose where I really needed to understand.
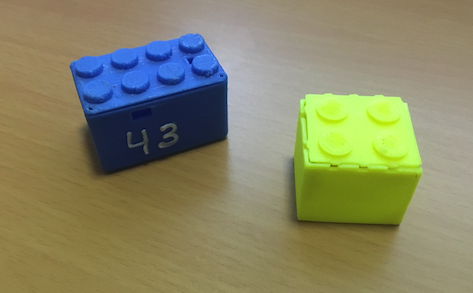
Well that time has come, particularly when I started trying to work with Yellow/Neon objects like the block sensor seen below.
I found a really well written explanation regarding why it’s so much easier to perform colour detection with HSV in a response to a post by penelope. Take a look at the stop sign pictured below:
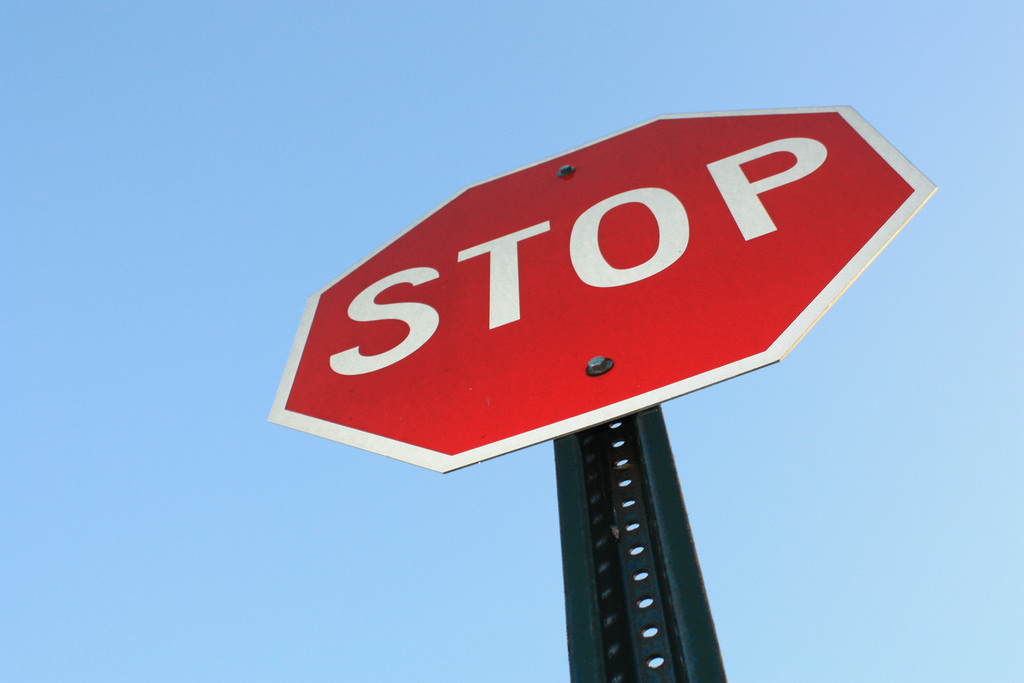
If we wanted to detect the stop sign in the image above, the first thing you’d think of trying is to try and scan for the colour red, or (255, 0, 0) in RGB. However this RGB value is extremely specific so the chances of actually finding true red in the image is extremely unlikely.
Next you might think to yourself, Ok well I’ll instead search for the colour red in a range of RGB values and just change the R (130, 0, 0) -> (255, 0, 0). However this doesn’t really solve the problem because most of the colour red in the stop sign image is still a mix of all three primary colours
So at this point we could continue going down this path, changing the RGB range for all three primary colour values; but it honestly requires a lot of effort to cover all our bases and even if somehow we do manage to get a reasonable range setup it’s very likely we’ll end up with a lot of noise in the fields we detect.
We need a method that doesn’t have to many parameters in order to simplify our detection space. This is where HSV comes into the picture (excuse the pun).
Let me quickly go over how colour is represented in each of the colour spaces.
RGB is defined by listing how much red, green and blue is contained in a single value. It uses an additive method where the more of each colour is added, the brighter it becomes.
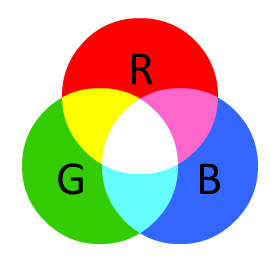
When you are looking at a particular colour it’s extremely difficult to arbitrarily dictate how much of each primary colour composes it.
HSV on the other hand uses three paramters to describe colour:

With HSV with we now describe our colour using a much more cement method as we only theoretically need to transform the Hue to capture the ‘red’ like colour.
OpenCV uses the following ranges to represent each of the parameters in the HSV spectrum
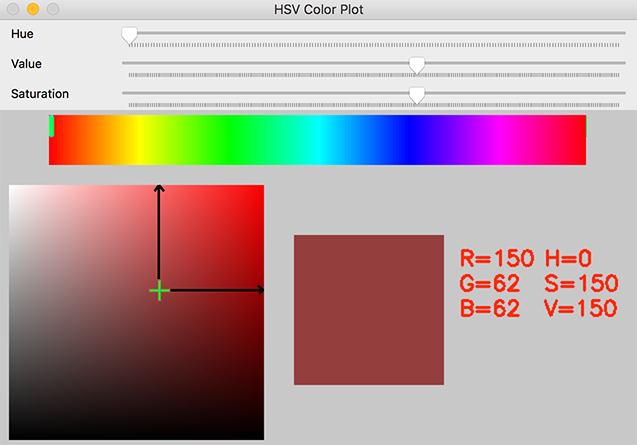
Looking at the red colour ranges we used in the previous post:
min_red = cv::Scalar(0,150,150);
max_red = cv::Scalar(10,255,255);
We produce the following range for the low Hue value
And the following is produced for the high Hue value
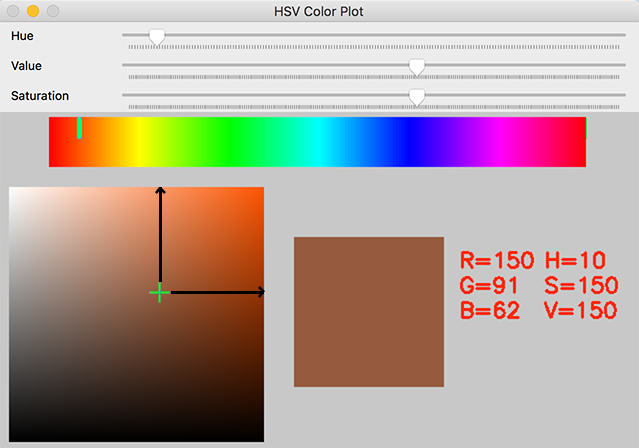
Obviously it’s still not completely perfect as we capture a fair amount of Orange with this range as well. But It allows us to target a huge set of red-like colours in a specific range without too much overall noise.
Why do we use the HSV colour space so often in vision and image processing? - http://dsp.stackexchange.com/questions/2687/why-do-we-use-the-hsv-colour-space-so-often-in-vision-and-image-processing
A Little About Color: HSV vs. RGB - https://www.kirupa.com/design/little_about_color_hsv_rgb.htm
Color Filtering - OpenCV - https://youtu.be/CCOXg75HkvM?list=PLQVvvaa0QuDdttJXlLtAJxJetJcqmqlQq
HSV inRange Colour Plot - http://answers.opencv.org/question/28899/correct-hsv-inrange-values-for-red-objects/
OpenCV Colour Plot Code hosting - https://github.com/HandMap/openCVColourPlot