In the previous post I looked at Haar classification and briefly dealt with drawing ontop of image outputs in the form of square objects on potential matches. Today I will be further looking into how to draw ontop of images with various different shapes.
I will also try to begin looking at image processing using another tutorial in the resource by Adrian Rosebrock titled Practical Python and OpenCV.
So far we’ve only been working with images loaded from disk directly, so we haven’t gotten a change to draw anything entirely from code. Since an image interpreted with OpenCV is really only a NumPy array; there really isn’t any reason why we can’t define that array ourselves and make changes to it before displaying it as an image.
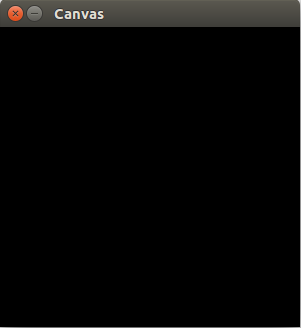
Below is code that can be used to define a blank canvas for us to work with using a NumPy array
import numpy as np
import cv2

canvas = np.zeros((300, 300, 3), dtype = "uint8")

cv2.imshow("Canvas", canvas)
cv2.waitKey(0)
The first two lines are simply imports for the NumPy and OpenCV libraries. Line 4 however is used to construct a zeroed NumPy array with the dimensions of 300x300, and also allocated space for 3 channels (Red, Green and Blue).
The other important thing to notice is the dtype value defined after the array specifications. Since we are representing our image as an RGB image with pixels in the range of 0->255, we choose to use an 8-bit unsigned integer (uint8). While there are other types we could use, they would offer too much or too little space for storing our pixel information.
Finally we display the canvas and wait for a keypress before closing it
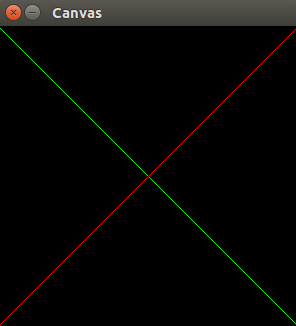
Next lets go ahead and draw some lines on our canvas. This can be done using a predefined method that’s part of the OpenCV library called line().
line() can be implemented using the following example as reference:
cv2.line(img, pt1, pt2, color, thickness=1, lineType=8, shift=0)
Using this information we can quite easily build a line using code like the following:
import numpy as np
import cv2

canvas = np.zeros((300, 300, 3), dtype = "uint8")

green = (0, 255, 0)
red = (0, 0, 255)

cv2.line(canvas, (0, 0), (300, 300), green)
cv2.line(canvas, (0, 300), (300, 0), red)

cv2.imshow("Canvas", canvas)
cv2.waitKey(0)
This should draw two lines, a red and green one on your blank canvas and display the results.
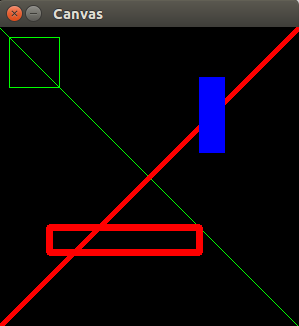
Rectangles are very similar and follow the same sort of syntax:
cv2.rectangle(img, pt1, pt2, color, thickness=1, lineType=8, shift=0)
The only parameter that you should worry about with rectangles that differ from lines is the thickness. If you would like your rectangle filled, then you simply set the thickness to -1.
I’ve updated the canvas code to include some examples of rectangles and various line thicknesses.
import numpy as np
import cv2

canvas = np.zeros((300, 300, 3), dtype = "uint8")

blue = (255, 0, 0)
green = (0, 255, 0)
red = (0, 0, 255)

cv2.line(canvas, (0, 0), (300, 300), green)
cv2.line(canvas, (0, 300), (300, 0), red, 3)
cv2.rectangle(canvas, (10, 10), (60, 60), green)
cv2.rectangle(canvas, (50, 200), (200, 225), red, 5)
cv2.rectangle(canvas, (200, 50), (225, 125), blue, -1)

cv2.imshow("Canvas", canvas)
cv2.waitKey(0)
Circles follow the same idea:
cv2.circle(img, center, radius, color, thickness=1, lineType=8, shift=0)
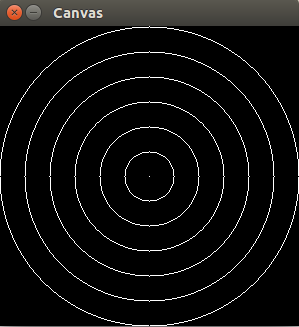
Below is an example of how to draw an archery board using OpenCV circle functions:
import numpy as np
import cv2

white = (255, 255, 255)
canvas = np.zeros((300, 300, 3), dtype = "uint8")

# Calculate the (x,y) coordinates of the center of the image
(centerX, centerY) = (canvas.shape[1] // 2, canvas.shape[0] // 2)

for r in range(0, 175, 25):
    cv2.circle(canvas, (centerX, centerY), r, white)

cv2.imshow("Canvas", canvas)
cv2.waitKey(0)
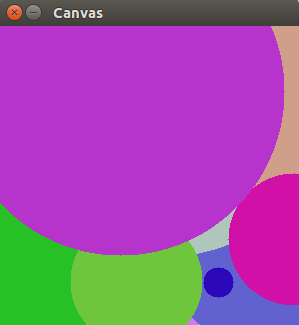
Finally, here’s some code to show off what you can do with the random function and circles:
import numpy as np
import cv2

canvas = np.zeros((300, 300, 3), dtype="uint8")

for i in range(0, 25):
    radius = np.random.randint(5, high=200)
    color = np.random.randint(0, high=256, size=(3,)).tolist()
    pt = np.random.randint(0, high=300, size=(2,))
    cv2.circle(canvas, tuple(pt), radius, color, -1)

cv2.imshow("Canvas", canvas)
cv2.waitKey(0)
This chapter provided me with the minimum things I require to get started with something more advanced. Next time I will be looking into the best methods for detecting the fingers on my hand using Gradients and edge detection methods.
OpenCV API drawing_functions - http://docs.opencv.org/2.4/modules/core/doc/drawing_functions.html#puttext
Adrian Rosebrock’s Practical Python on OpenCV - https://www.pyimagesearch.com/practical-python-opencv/